Cinnamon Apple Manhattan

apple cinnamon manhattan cropped

This week’s #midweekmanhattan is made Christmas-appropriate through the addition of cinnamon and applejack:

  1. Add 50ml rye whiskey, 25ml applejack, 15ml cinnamon vermouth and two dashes of bitters to a mixing glass with cubed ice.
  2. Stir well and strain into a chilled coupe.
  3. Garnish with a dried apple slice and cinnamon stick.

To make the cinnamon infused vermouth, add ten cinnamon sticks to a 750ml bottle of sweet vermouth and leave to infuse for 2-3 days.

To make the apple chips:

  1. Preheat your oven to 95’C.
  2. Slice an apple into thin slices and place in a 8:1 water to lemon juice solution for half an hour (to prevent browning).
  3. Place on a baking tray and sprinkle with sugar and cinnamon.
  4. Bake for 1-2 hours until golden brown.

Mince Pie Cognac

4211230345_96d13e6ac5_b

Photo courtesy of Sarah, some rights reserved


Last year I put the decision between Christmas pudding or mince pie bourbon to a Twitter vote and Christmas Pudding Bourbon came out on top.  It was tasty, super sweet and full of festive flavour.

This year then, it is the turn of the humble mince pie to be boozified.  I’ve decided to infuse it into Cognac instead of bourbon and over the next four weeks I will use this to showcase four Christmas cocktail recipes.

As I suggested last year, the mince pie infusion is much easier to make, but in an attempt to help create a clearer, more easily filtered infusion, I have decided to follow a sous vide recipe.

  1. Add 500ml of good quality Cognac and 200g of store-bought mincemeat to a ziplock bag.  Expel all of the air and seal.
  2. Heat the sealed bag at 45°c for one hour (see my Sous Vide Syrup recipe for my home sous vide technique).
  3. Once the hour is up, place the sealed bag in the freezer overnight.
  4. Next morning strain and filter the mix and bottle.  Yum!

Camomile Sour

Whiskey Sour by Paul Goyette, some rights reserved

There’s nothing better than a delicious accident.  I made camomile bourbon a while back, and, for some reason, decided to use it in a Camomile Manhattan.  Look, I was young, experimenting, and a little obsessed with Manhattans, I didn’t really know what I was doing.

Anyway, some months later, having run out of regular bourbon (shock-horror indeed). I tried the camomile-infused version in a Whiskey Sour.  What a revelation.  The lemon and the camomile sat so well together I now almost despair a little that I didn’t think of this in the first place.

So, making up for lost time, I heartily commend to you the Camomile Whiskey Sour:

  1. Add 9 tablespoons of camomile flowers to a bottle of bourbon.  Leave this to infuse for 24 hours and then strain and filter.
  2. Add a large measure of camomile bourbon, a measure of lemon juice, half a measure of sugar syrup and half a measure of egg white to a shaker.
  3. Fill the shaker 2/3 full of ice and shake well for twenty seconds.
  4. Strain into the mixing glass and then dry shake (no ice) for a further ten seconds.
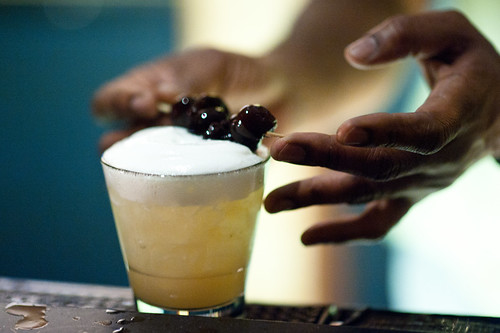
  5. Strain into a rocks glass and garnish with a slice of lemon and a cherry.

Gingerbread Old Fashioned

20131220-142158.jpg

A short #FridayOldFashioned post for the Friday before Christmas – traditionally a day when carnage is wreaked up and down the High Streets of Britain as office workers go wild with stick-on antlers and snowman deeley-boppers.

Personally I’d rather be at home in the warm in a reserved Christmas jumper enjoying a warming whiskey cocktail than out in an overly chintzy decorated chain pub downing lager or ‘draft’ mulled wine by the bucketload, so here’s a simple recipe if you’re of a similar mind:

  1. Combine a barspoon of gingerbread syrup*, two ounces of whiskey and a sploosh of bitters in a mixing glass.
  2. Add ice and stir well for sixty seconds.
  3. Strain into a chilled old fashioned glass, over ice.
  4. Garnish with an amaretto cherry (Christmas tincture optional).

* You can make your own by adding ginger and cinnamon to a basic simple syrup recipe (follow Nigella’s recipe here) or use the pre-mixed Starbucks or Monin versions that are reasonably easy to find in the shops at this time of year.

Christmas in Manhattan

20131219-233322.jpg

Avid readers (hello mum!) will recall that last week we started infusing the guts of a Christmas pudding in some bourbon.  One week on and the infusion was ready to be strained, filtered and decanted into a bottle:

  1. Sieve the fruit from the bourbon and press down on the fruit to express as much liquid as possible.
  2. Filter the syrupy liquid through coffee filter papers and store in a clean bottle.

This has a longer shelf life than its taste will require.  In other words you will finish it before it spoils!  My first pour with the finished bourbon was a Christmas Manhattan (I think I might have overdone it!):

  1. Combine two measures of Christmas pudding bourbon, one measure of sweet vermouth, half a measure of Christmas Mulled Cup and two dashes of Teapot bitters in a mixing glass.
  2. Add ice and stir well for sixty seconds.
  3. Double strain into a chilled coupe.
  4. Finish with a spritz of Christmas tincture.

Christmas Tincture

1441549_1438106343068917_716404932_n

For me, nothing evokes the joy of Christmas like the smell of a Christmas tree (that and the smell of the Christmas box that stores my parents’ decorations for eleven months of the year, though I haven’t worked out how to bottle that yet).

The easiest way to capture aroma in a drink is to create a tincture – an alcoholic extract of a plant, or an intense and high (80-100% proof) alcohol infusion.

So once we’d purchased our Christmas tree this year I relieved it of one good size branch and then:

  1. Combine 60ml vodka in a small jar and add a handful of Christmas tree needle branches.
  2. Leave to infuse for 3-4 days.
  3. Remove the branches and bottle the tincture in a diffuser.

The finished tincture can be used to rinse glasses or glass stems or as a light spritz over the top of a finished drink – don’t over do it though, too much pine can be poisonous.

Christmas Pudding Bourbon

Photo courtesy of dannyasmith (Flickr), some rights reserved.

My aunt makes the best Christmas Pudding.  No, no arguments, it’s true.  So when I was trying to decide on a festive infusion and I threw the decision out to a Twitter vote between Christmas pudding and mince pies I was really hoping the pudding would win.  Granted a mince pie infusion would have been slightly easier (add mincemeat to bourbon and wait) but you can eat mince pies for pretty much an entire month or more, Christmas pudding is really only a once a year, or twice if you’re lucky, treat.

So once the decision was made – democratically – the next question was how to combine a Christmas pudding with a bottle of bourbon.  One option – following the 69 Colebrooke Row panettone bellini model – was to take a blender to a pudding and dissolve it as much as possible.  That required a whole pudding, so instead of starting at the end and deconstructing I opted to start with the ingredients and flavours of a Christmas pudding and build up.  To make 350ml (half a bottle of bourbon):

  1. Add 125g dark brown sugar, 50g mixed peel, 125g sultanas and 75g raisins to a mixing bowl.
  2. Grate the zest of half an orange into the bowl and add the juice.
  3. Add 1/2 teaspoon of almond essence, 1/4 teaspoon of nutmeg and 1/2 teaspoon of mixed spice.
  4. Finally add a cinnamon stick, the scraped contents of a whole vanilla bean and 350ml bourbon.
  5. Stir well and cover the bowl. Leave in a cool place for about a week, stirring once a day.

At this stage, the brown sludge looks distinctly unappetising, but smells incredible: orange, vanilla and bourbon – perfect winter flavours.

After a week, strain the mixture through a fine sieve – mash it right down to get all the juices out (and retain the fruit as an accompaniment to vanilla ice cream) then filter through a coffee filter paper.  Store the infused bourbon in a clean bottle and it will keep for six months or so.

And serve..? You’ll have to wait til next week for that…

Sous Vide Syrup

IMG_3989

Always on the look out for a new homemade project, and perhaps inspired by the episodes of MasterChef Australia that my flatmate is so fond of, I decided to embark on my first sous-vide project: a simple fruit infused syrup.

Sous-vide (literally ‘under vacuum’) refers to a method of sealing food in an airtight bag and cooking it in a water bath. The overall process allows the food to cook evenly, with the bag ensuring that as much flavour as possible is kept in. The water bath makes it easier to regulate the temperature – keeping it constant and at a precise temperature for a long period of time.

Sous-vide cooking has been used in high-end restaurants since the 1960s, and celebrity chefs and TV cookery programmes have raised its profile in recent years. Behind the scenes, a number of bars have also discovered that the process works better than simple maceration insofar as it allows the liquid to fully adsorb the whole flavour of the fruit, avoiding the bitter or musty flavours that can be created as the fruit is broken down.

A starter sous-vide machine will retail for around £250, but fortunately there is a quick and easy way to reproduce the effect with reasonable results in your own kitchen.

Making the Syrup

I decided to make 250ml of raspberry syrup as a first attempt. First I bought a box of medium sandwich bags – these were probably a bit larger than necessary for the quantities that I will be making, but the added size does make it easier to add and remove the ingredients without spillage, and at least I’ll be all set up if I decide to go into industrial production in the future!

To make the raspberry syrup I put 170g of fresh raspberries, 190g of white sugar and 240ml of cold water into a bag. I sealed the bag, and squeezed out the air to create a vacuum.

I then moved to the hob to construct a basic bain-marie by placing a small saucepan of water inside a large saucepan of water. When constructing this it helps to use pans that nest together evenly (I didn’t!) and to remember Archimedes’ principle (I didn’t!). The aim is to have the smaller pan about half submerged in water in the larger pan.

Heat the water until the top pan has reached a steady temperature of 57°C. This will require a fairly accurate thermometer and I found that mine didn’t enjoy long exposure to the high temperatures. Once the water has reached the required temperature, place the bag of ingredients into the smaller pan and cook for 30 minutes. Try to maintain the steady temperature throughout the cooking time. This may be easier said than done, but I managed to stay within a range of a few degrees.

Once the cooking time has elapsed remove the bag from the pan and allow it to cool briefly. During this cooling time, prepare an ice bath by filling a container with cold water and a handful of ice cubes. Place the bag (still sealed) in the ice bath for approximately ten minutes.

Meanwhile sterilise a jar or bottle and once the syrup has cooled, fine strain it into the container, and add about 10ml of vodka to extend its shelf-life.

The syrup should be kept refrigerated and will keep for 2-3 weeks.


Absinthe Foam

Photo by Jared Zimmerman, some rights reserved.

And so to foam.  Having come all this way (48 posts and counting) without touching on the trend for ‘molecular mixology’ seems remiss, so let’s correct that right now.

Having been warned off the use of dry ice after recent horror stories in the UK, and not having any scientific background or interest in what is really just a gimmick, cocktail foam is about the only element of molecular mixology that can be easily and relatively safely approached by the amateur.  While the use of a rotovap or calcium bath does appeal (the former more than the latter), the costs are somewhat prohibitive at this stage, and so we stick to foam.

There are a number of ways to create cocktail foam, and recipes differ on whether you should use egg white and elbow grease (or Aerolatte), or gelatine and N2O or a combination of the lot.

Your choice will most likely be influenced by the resources and ingredients you have to hand, but my preference is for a hybrid recipe:

  1. Dissolve half a packet of gelatine in warm water and add 30g of sugar until it dissolves.
  2. Allow the mixture to cool.
  3. Add one egg white and your flavouring – in this case I used a large measure of absinthe.
  4. Pour the mixture into your soda siphon/cream whipper and charge with two capsules of N2O (leave the second one in)
  5. Refrigerate for at least an hour.

To dispense the foam, shake the siphon until no movement can be felt inside and slowly layer the foam on top.  Keep the siphon in the fridge when you’re not using it.

Earl Grey Syrup

Regular readers may have noticed that in the early days of this site I used a lot of tea. Mainly tea-infused vermouth, but also tea-infused bourbon. I stuck mainly to green tea, chai and peppermint, but deep down inside what I really wanted to make was an Earl Grey Old Fashioned. An Earl Grey Old Fashioned and an Earl Grey Martini. I tried the former on Earl Grey’s birthday, but found that using Earl Grey infused whiskey made the drink too bitter. The solution was simple. Earl Grey Syrup.

I have already explained the basics behind home-made simple syrup, and a tea-infused syrup is no more complicated than this, you just use tea instead of water.

My Earl Grey syrup was made like this:

  1. Soak a teaspoon of loose leaf Earl Grey tea in 200ml of warm water for an hour. You can use a bag if you must, but I used Jeeves and Jericho’s Earl of Grey (at least in part because I love the colour of the cornflower petals).
  2. Pour the tea into a saucepan and bring to the boil.  Leave the bag/loose tea in the pan.
  3. Add 100g of sugar and simmer for ten minutes.
  4. Remove from the heat. Double strain and pour into a clean (sterile) bottle.

The syrup should keep for about a month if refrigerated. If you add a dash of vodka to the bottle it will keep even longer.